Created a build number script to The Lost Adventures title screen

I was sick of guessing how recent the installed version of The Lost Adventures was on my iDevices. So I made an Xcode pre-build script that writes the Git commit number plus a date/time  to a simple txt file.

This is picked up and shown on the main title screen.

IMG_1512

I thought I did more commits last year… But maybe I didn’t commit at the start of the project…? That could be… Vacation….? Anyway, nice…!


Archived: Uncategorised

Screenshot Sunday : When you gotta go, you gotta go

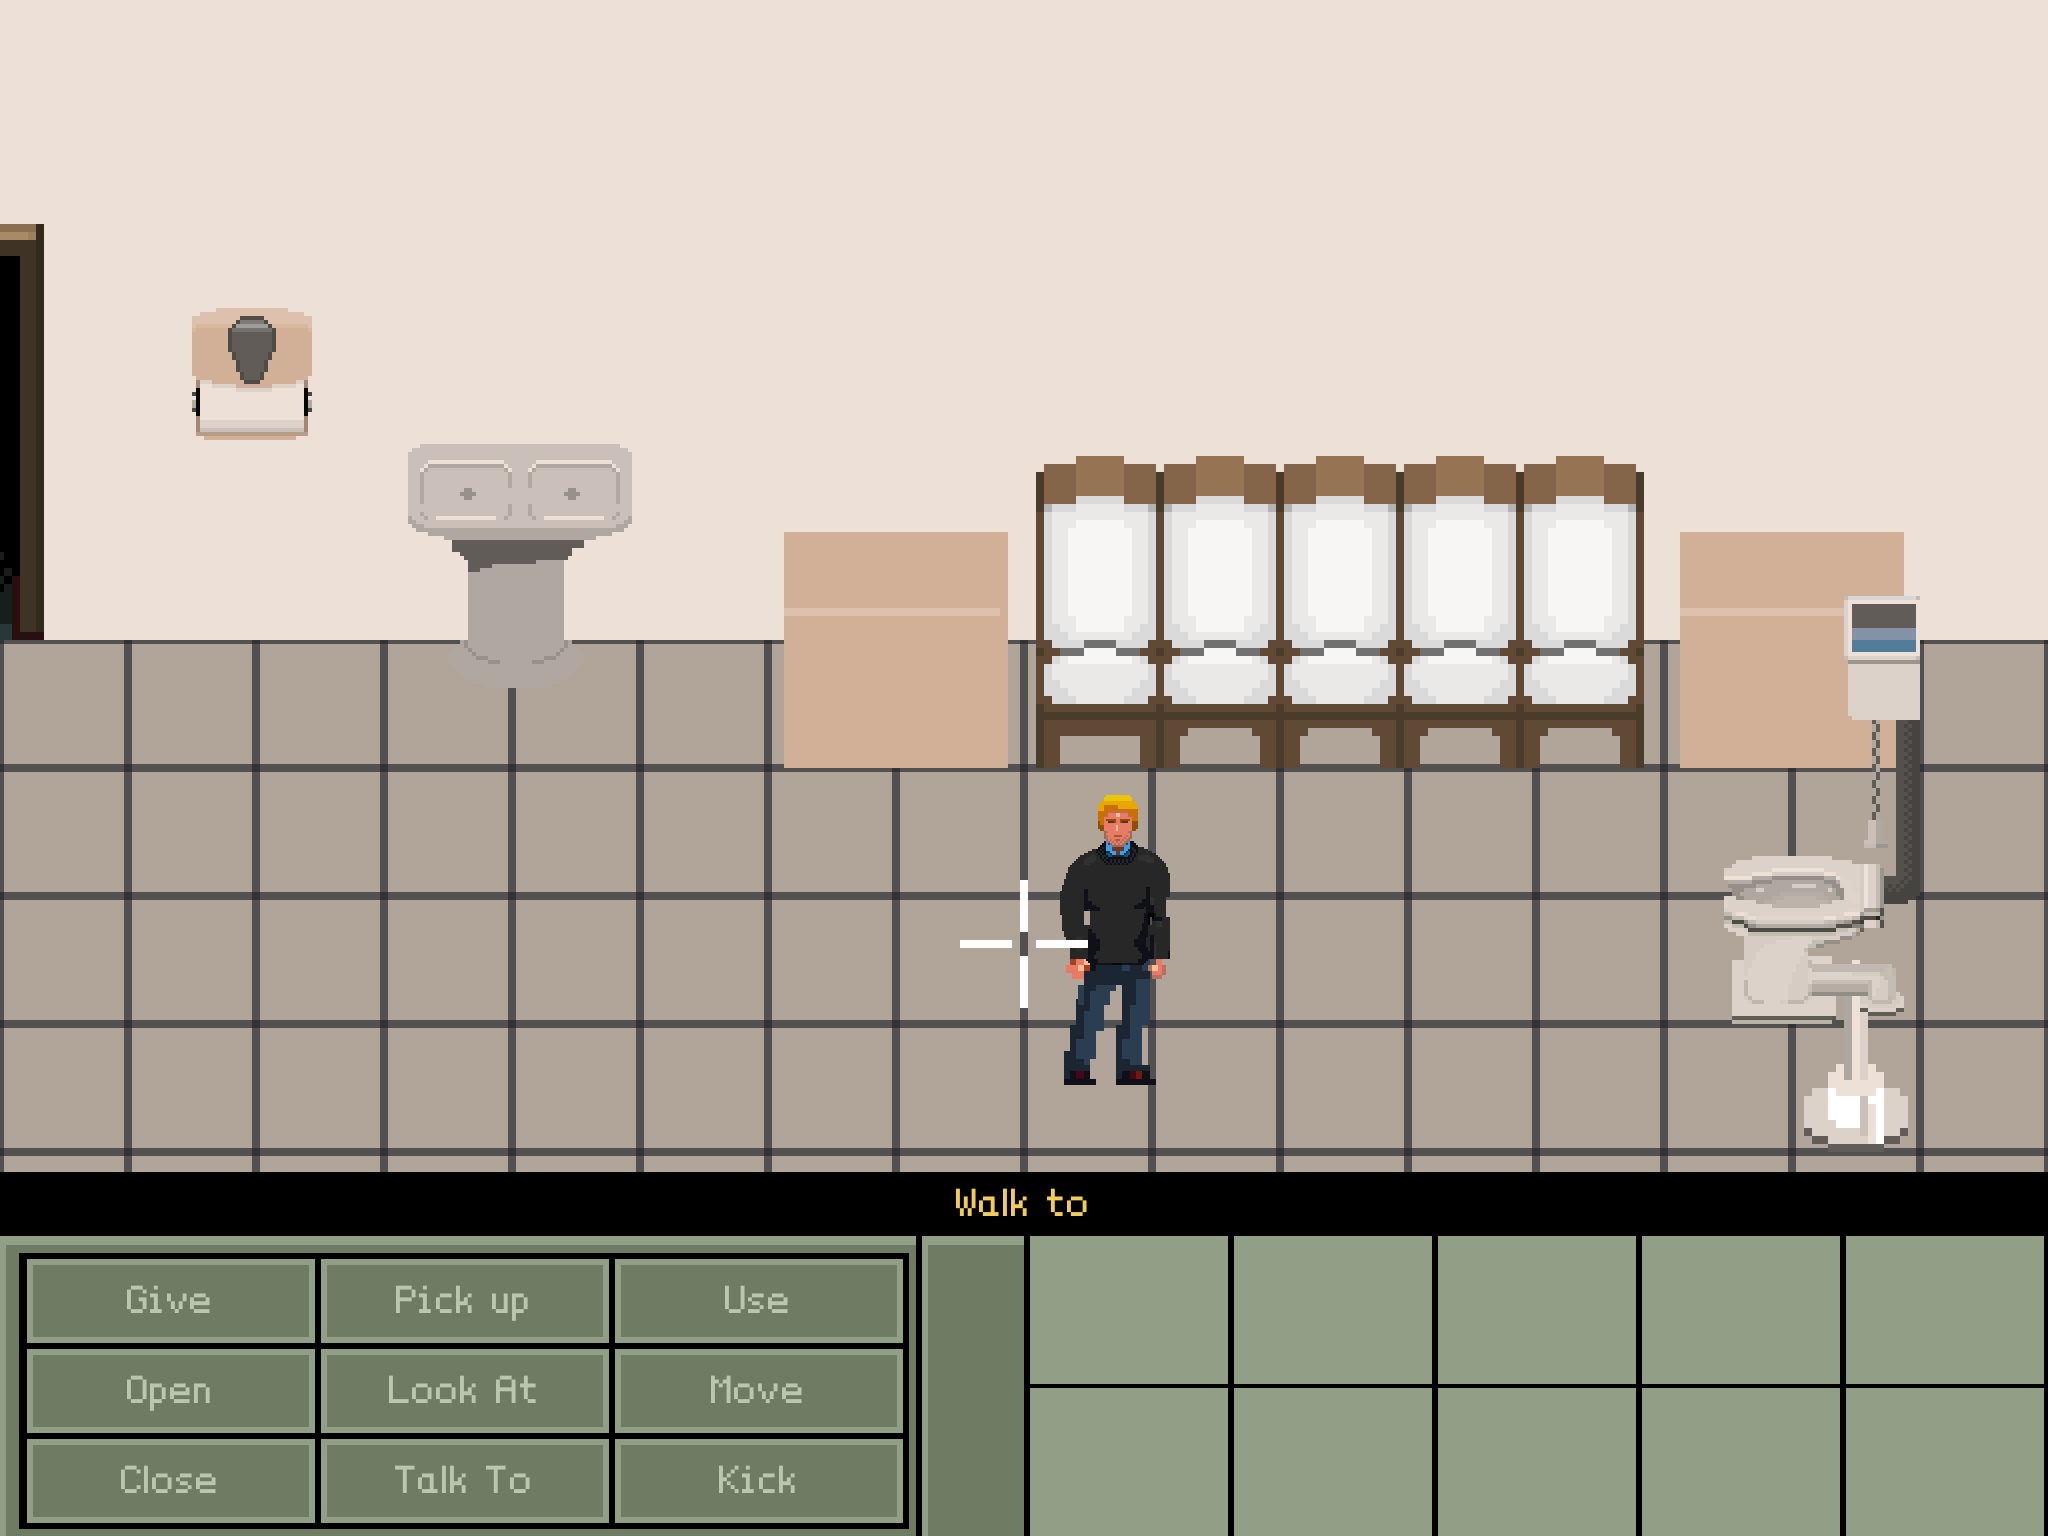
One of the rooms in The Lost Adventures will be the mens toilets. If I tell What Dave needs to do here I would  spoil one of the puzzles of the game. No spoilers here !.

You can obviously try to “use” the toilet, but supporting this action would take me hours of animating those 9 frames to sit down and what to think about those frames for pulling the chord to flush?

But who knows? When I have some more common animations for Dave, maybe….

Oh and do you see that white crosshair? I was watching the GUI of the Fate of Atlantis and this was still missing in my adventure game. The default action will be the “Walk to” action (not a button on the screen, but still an action). When you hover over the items, the label of a POI (Point of Interest) will be shown.

This presented a problem on the iPad though… Your hand blocks the visibility of the label, so I need to place the label to the left or right. Or I will place the label-bar to the top especially for the iPad.

tolietSceenshot

Enough tasks left to improve though. I am still in the preproduction stage (and this is actually good!!). Polishing a game and making content  is much harder and more tedious! Luckily all rooms are in draft now, to support the entire story for Level 1.

When the work on the adventure engine is finished and I have made one playable level, I will be in production stage. One of the main task is passing the list of actions to the Lua scripting engine.

I have greatly improved the way the scripting works. The drawback of an earlier approach meant timing the various actions exactly before the next scripted action started. I needed to solve this because the time taken by walking through the room was not predictable. Now the character can walk to a certain tile, then proceed to a new action like picking up an item (this is calculated by number of frames * frame-delay). These walking and animation actions are handled completely in sequence. Playing a sound can be a simultaneous action. The next blog post will be entirely about this nifty system.

Archived: Uncategorised

Ambient Adventure Music

One of the problems as a hobby Developer is in-game-music. This is a tough nut to crack for any developer. A proper musician will cost you a lot of money.

Luckily there are some solutions to this problem. Generative music is one good example. Recently some good tools have been made available. One of them is Ujam. It’s amazing to see how quickly you can make a decent sounding beat or melody. It converts you voice into a melody and after that you can choose an arrangement based on music style. It’s made completely in flash, so won’t work on iOS devices.

I have also tried Noatikl2 and Mixtikl but they are too hard to use and have a steep learning curve, and I have some more things to do. For an adventure it has to sound decent enough.The most important thing is that it should not distract or annoy the player.

Another possibility making music is whistling the tune, converting it to midi and make it into a song in Garageband.

Here a list of commercial tools that can do such a thing :

Free tools

  • Whistlemagic (can’t provide a good link, windows only)

iOS tools (all Paid, but not)

One tools fits in both categories and it’s my favorite (for the moment).

screen640x640

Casio Chordana Composer is absolutely fabulous. It used a short melody (keyboard,whistle or voice) as seed and generates a song after you have chosen an arrangement and music style. The best thing is that it doesn’t sound like it’s generated at all!

The following music was generated with Chordana, played and recorded this midi file with Roland’s iOS Sound Canvas (it’s quite an expense app but worth it). Well enjoy the music…

Archived: Uncategorised

Animated assets from the very beginning

It is fun to see how I thought about asset creation before I started.  I made a lot of stuff with 3D Studio Max and Blender for earlier games. A lot of the assets for Blooneycounter were made with the help of Blender. So it was logical to make some of the stuff with those tools. I knew that animations were hard to do and I though I could make a pixelartsy look with the right shaders. I never made any animations so I didn’t know how to do that.

I made a character that had a good bone setup with the MakeHuman tool. This is completely free and you can tweak the model before exporting. I picked up some nice walking animations from Carnegie Mellon University site. And after some time you have a walking figure. Exporting the frames gave the following animated character:walkLeft

The good thing about modeling is that you can render it from any angle for free :

walkUpBut the thing is…. It looks crap… And even how I tried my best. It looks darkish, awkward and everybody knows it was a 3D model.


So I decided to ditch the Blender way of doing stuff, and decided to hand animate frame by frame. And although making frames this way is sometimes time-consuming, it looks bright, nice and pixelated. Above animations are rendered at 60FPS… way to much for pixel art. Usually any animation has about 9 frames. My characters are 70×150 and it’s very doable.

I bought character animation fundamentals to help me understand posing and acting characterscharacter

My animations are improving steadily and I love how it looks. I created a falling animation in less than 4 hours, and that’s okay. I plan to make about 20 animations for the first level. I already created about 12, so still 8 to go.

These are the ones left (for the first level):

  1. Putting up glasses
  2. Throwing a flashing grenade
  3. Dog animation
  4. Hand animations (no spoilers)
  5. Reach high animation
  6. Reach low animation
  7. Sit and eat animation
  8. Vaporize animation


Archived: Uncategorised

Picking up stuff… It’s a lot of work really

Any adventure game would be boring without any believable animation. This takes some time though, but with the help of some excellent tools it’s doable. I create my animation frames with Gimp (and a layers export plugin found here) and refine and play the animation with Asesprite. I add the frames to Texture packer and it’s ready to put it to use in the game.

Well let’s stop talking and show some video of picking up a hammer for example….!

Picking up animation from franzzle on Vimeo.

Off course this is only picking up from the floor.

Imagine the list :

  • Picking up as seen from behind on the floor
  • Picking up as seen from the front on the floor
  • Picking up as seen from behind from high places
  • Picking up as seen from behind from mid height places
  • etc…

Luckily… some of the mid height animations can also be put to use as push button animations.

Archived: Uncategorised