Last week I participated in another Game Jam. This jam was not related to Libgdx but I could focus in my spare time on my entry. Time was really short (1 week). But… got something playable that shows promise for a future game. The theme of the Jam is to win by losing. And that is quite a hard assignment.
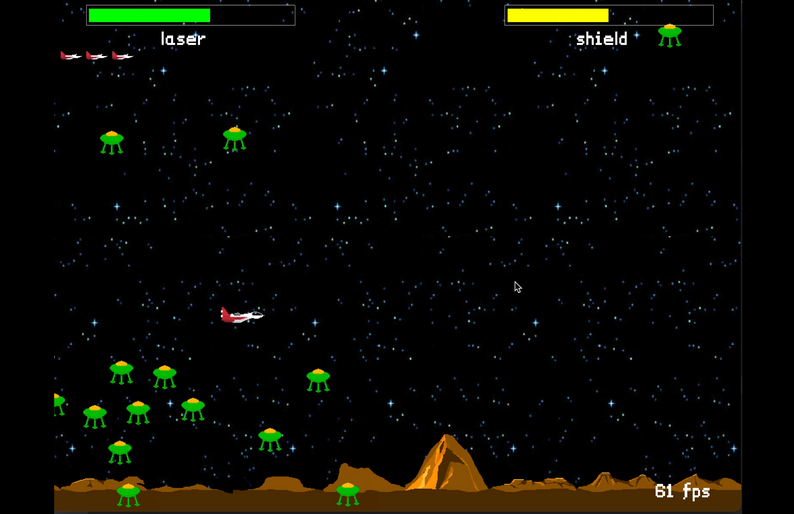
The name of the game is Psirens and it is a 2D Defender style game.
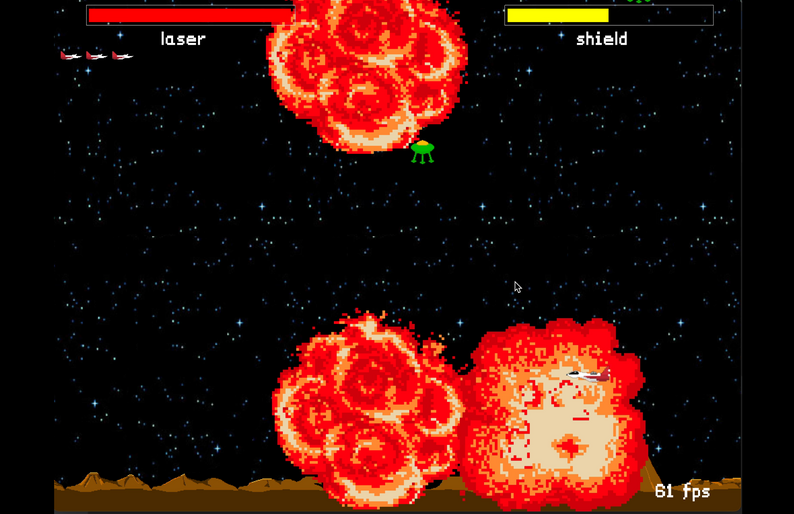
The enemies are sometimes fleeing when you are shooting. The key to the game (that was the intention) is to overload your laser or shield or crash into the planet and then trigger a set of explosions. The blast radius will trigger a set of blast radii of the enemies that exploded due to the ship and those blast radii should lead to a cascade of explosions reaching other ships.
As in true Retro Arcade fashion… When you reach a certain score threshold you will be awarded another ship and you could continue your weird battle against the aliens.
Unfortunately I had 30 minutes left in the jam, so I had to wrap up quickly and the fun gameplay part needs to be refined in other types of Game Jams.
It’s my first so happy that it is playable and looks good.
Found a load of bugs already. But too tired to continue.
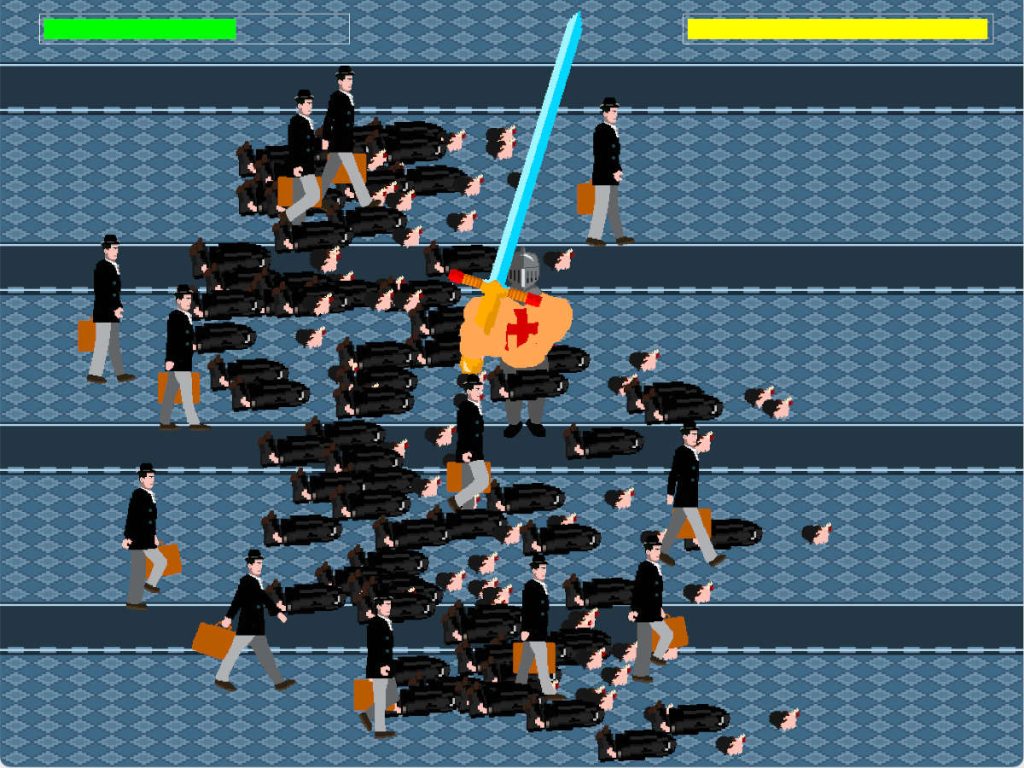
The Game is called Slashed Corporate Corpses and is some pun after the Unity disaster. I feel for those hardworking Indie Game Developers and this is how they can blow off some steam.
Screenshot
I will update this post with some details about how it hold out against the rest of the submissions.
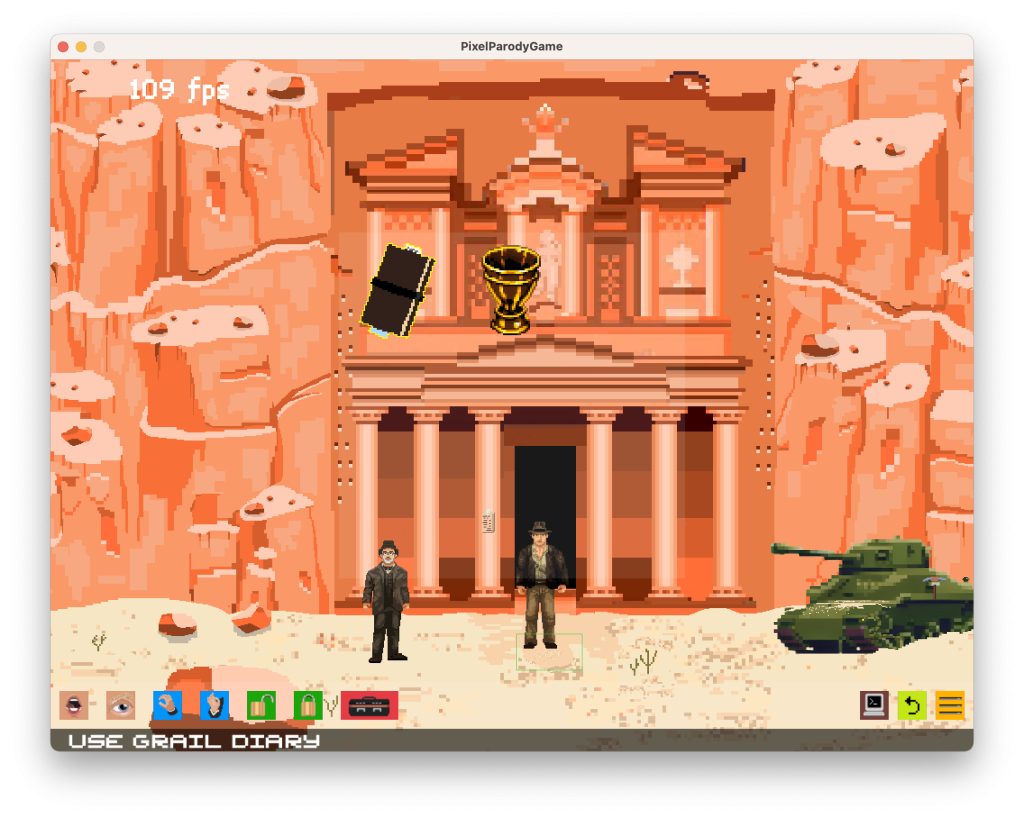
I am creating a Point-and-Click engine, especially for my newest game project, ‘PixelParody.’ This project began after the release of my iOS game, The Lost Adventures. One of the issues with this game was the complexity of the scripts used for the rooms. These scripts were challenging to maintain. What I actually discovered was that I wanted to have a DSL (domain-specific language) as the main driver for the rooms.
So how would such a DSL look and still maintains the power of Groovy or Lua when necessary?
    onUsingObject(doorknocker){
        tasks {
            task boris.moveCharacterTowards("doorknocker")
            task boris.orientUp()
            task room.playSound("doorknock.wav")
            task boris.waitSomeTime(2)
            task bobby.say("670238B1-D087-440B-814E-252020EB0149", "They probably know it is you at the door and won't let you in !")
        }
    }
What this set of tasks does is create a series of ‘Closures’ that run sequentially. This allows the character to walk toward the desired object, orient themselves correctly, and play a door knocking sound. A snide remark by an NPC is triggered after 2 seconds.
What this scripting also enables is an AI Tool like ChatGPT to generate these scripts for you if you tell it what to do in natural language. This works especially well. In the future, tools will also be able to display a GUI interface and should be as easy to use as Scratch.
Making my game a ‘Talkie’
What remained the same as in ‘The Lost Adventures’ is the voice and lipsync in the new engine. But especially I made new tooling to support me in generating the Rhubarb lipsync sequence. You can find the github project here, it is called lipsync-flux-api. It uses Flux API to be able to track the progress as the Lipsync process can take up quite some amount of time.
As this project supports a runnable GUI and a Rest API (with Open API support) it can be incorporated in any kind of build pipeline. But you can also use the GUI for quick processing
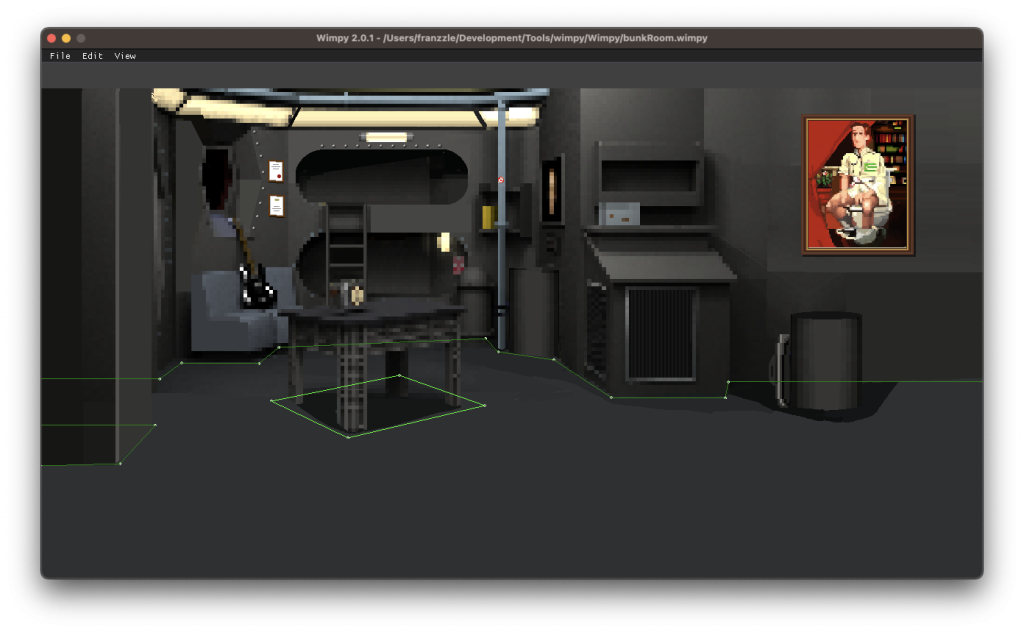
Blocky NavMesh Pathfinding
Another big advancement in this engine is the Pathfinding (the Lost Adventures used a tile based A* algorithm). This engine uses a dense Navigation Mesh and an algorithm to reduce the waypoints to get that ‘blocky’ walk pattern you often see in classic Point and Click games.
The green points are the inputs for the Navmesh.
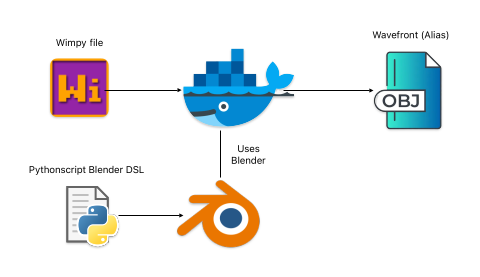
A tool is converting these ‘holes’ into a Wavefront obj file that has an empty value for Z (normally UP in 3D), loaded in the Game engine. So if you need to tweak the mesh, you can easily do that in Blender.
The Tool is a little bit of a ‘Frankenstein’ tool that takes a ‘.wimpy’ file and converts this into a wavefront file with a containerized Blender.
It sounds as a lot of work. But without automating of these tasks, it will become a drag on your flow and the game will take much more time to make.
So always Automate,Automate, Automate…….!
Reinvented Inventory Interaction
One of the most enjoyable aspects of this game is the inventory interaction. I’ve examined numerous Point-and-Click games, and in many cases, inventory management felt somewhat awkward. In ‘Fate of Atlantis,’ for example, the inventory is always visible, but it occupies a significant portion of the screen. Some games attempt to address this by implementing a collapsible inventory, but I found that approach to be less than ideal as well. So, I began to wonder: Can I make the inventory pop up in the center of the screen while still allowing the room to remain visible, complete with all its details?
This approach has some drawbacks as well. I wanted to avoid forcing players to constantly combine ‘Look At’ or ‘Use’ actions on inventory items. Instead, interaction occurs by simply dragging the item to any location, object, NPC, or playable character. When you drag it onto a playable character, it provides a description of the item and offers a hint to drag it again if the character needs to use it. For example, in a scenario like ‘Use the potion to gain strength,’ this interaction method felt very intuitive.
An outline gives feedback what is combined. You can drag :
Inventory items on other inventory items.
Inventory items on NPC’s
Inventory items on Playable Character
Inventory items on scenery items
Releasing
The latest innovation is once again ‘Automation,’ particularly in the release process. The plan is to begin with itch.io as the distribution platform. It is free, and this game requires more ‘Adventures’ before it can be considered ‘marketable’ to casual Point and Click enthusiasts. I have created a Jenkins pipeline to generate releases for Mac and Windows, and in the future, I will also incorporate pipeline tools for Itch and Steam
How to render out everything in your world so that when when a character is behind an object then parts of that character are not visible and when you are in front of an object then you are completely visible?
In 3D engines it is sort of easy, the rendering is done with the help of a ZBuffer. And in Libgdx actually everything is rendered with a 3D engine, although you will not immediately notice.
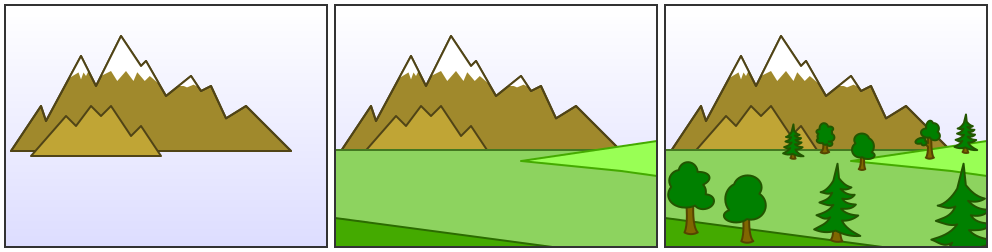
In 2D Engines you need to start laying out how your scene should be drawn with the help of some data structure. Mostly your scene contains a background, a part of that background that is more of a backdrop of your character and some parts of the scene are only in the foreground. The tricky bits are the objects where the character can move in front of or move behind it.
The best way to display my world is to use the good old ‘Painters algorithm’ that basically says. Start with the stuff that’s farthest away, they layer each other part that is closer to your eye. The eye in your game is the camera.
The best way to display my world is to use the good old ‘Painters algorithm’ that basically says. Start with the stuff that’s farthest away, they layer each other part that is closer to your eye. The eye in your game is the camera.
The famous painters algorithm that go way…. way… back. Ancient algorithm actually…
One way to identify the order of painting is with some kind of number. You could say that, the higher the number , the farther it is away from the eye (camera).
The Wimpy tool’s output has a field zsort that allows me to identify a sort of ordering number and also a usedir that I can use to indicate it is part of the backdrop. I think that the property is actually useable for the direction in which the character should face when it is (for example) looking at the painting.
The same I could do with objects that are always show in front of anything else. Those objects can have a usedir with “DIR_FRONT”. For example the next picture shows that the character always is behind of the chandelier, but always in front of the mirror.
Chandelier is always in front and the mirror is always show in the back.
But those objects that are present IN the room. How should these be handled? You could restrict those objects to have a rectangular form so that it is easy to check if the character overlaps on the front part or overlaps on the back part.
But that is restrictive when you have some interest perspective angles on certain items.
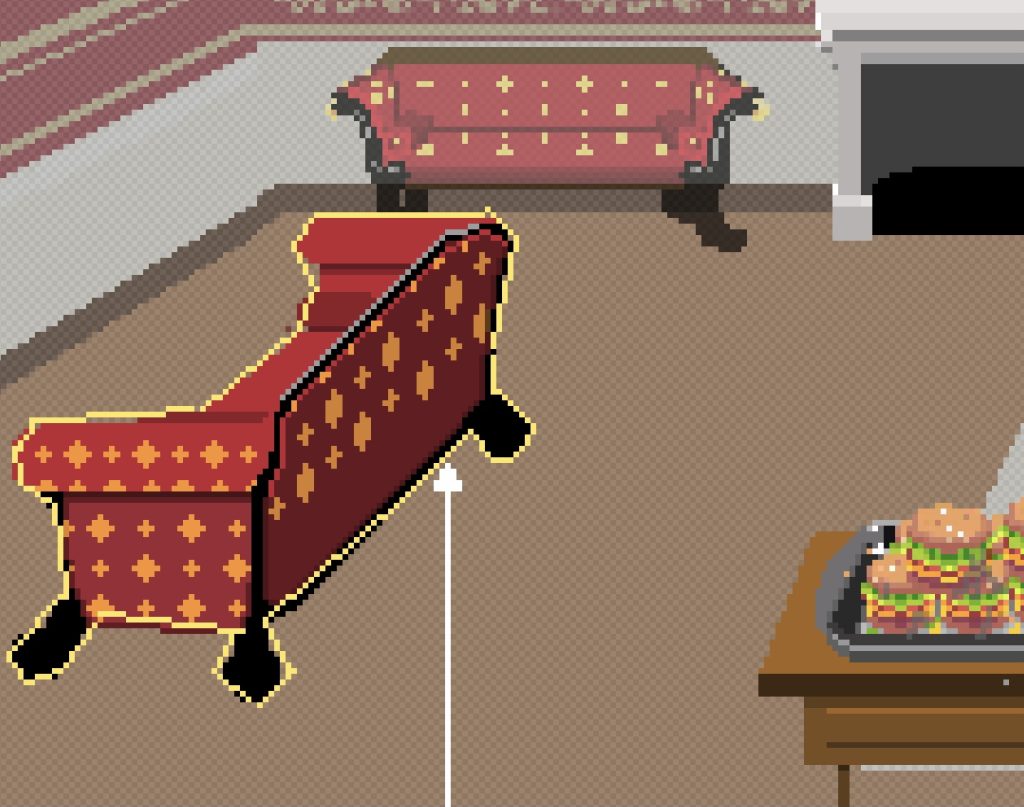
When rendering goes bad…. and character seems ‘crushed’ and flattened by the big sofa.
But luckily there is a way to do it…. Let’s show the strategy with two pictures :
First : cast a ray to the polygon that is defined for the ‘big sofa’
Remember the MINIMUM Y-Position for all the intersected points with ray and the polygon.
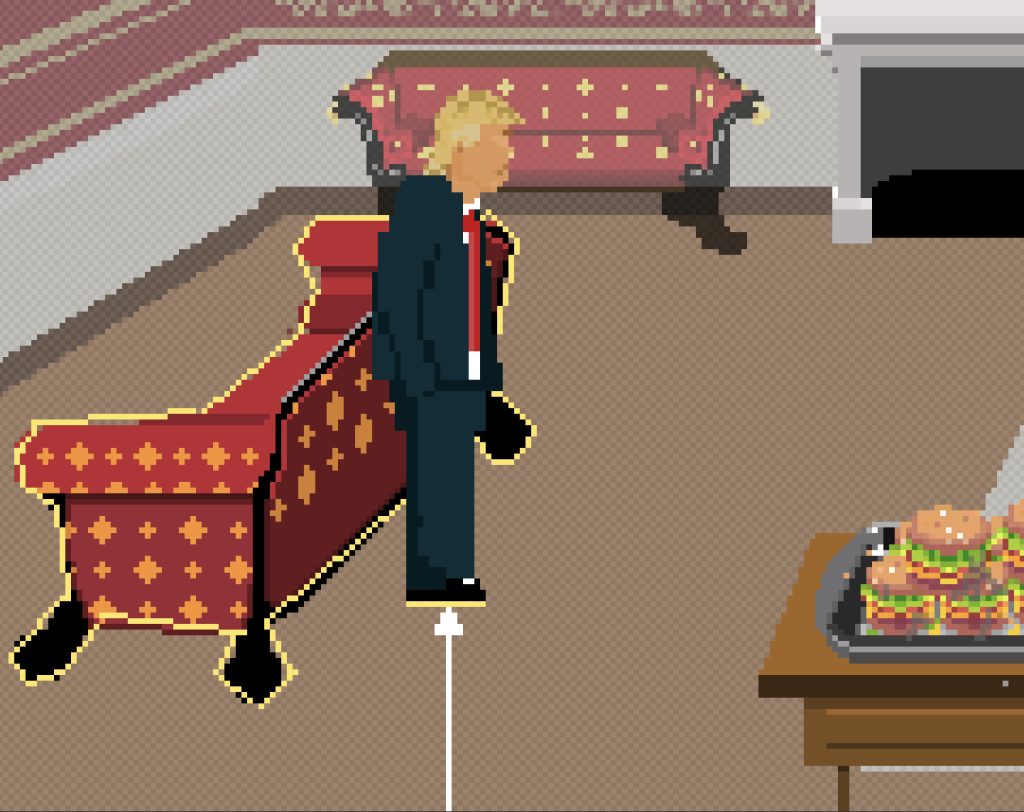
Second : Cast the same ray to the bottom of the character
Remember the MINIMUM Y-Position of the characters ‘base’ (can be derived from the bounding box)
If the characters Y-Pos is lower than the objects Y-Pos, than the character is in front of the object, otherwise it the character is behind it.
This works really well and of course it is not perfect as the character could stand between the two legs in front of the big sofa. But you could either restrict movement there or make the polygon closed and more convex.
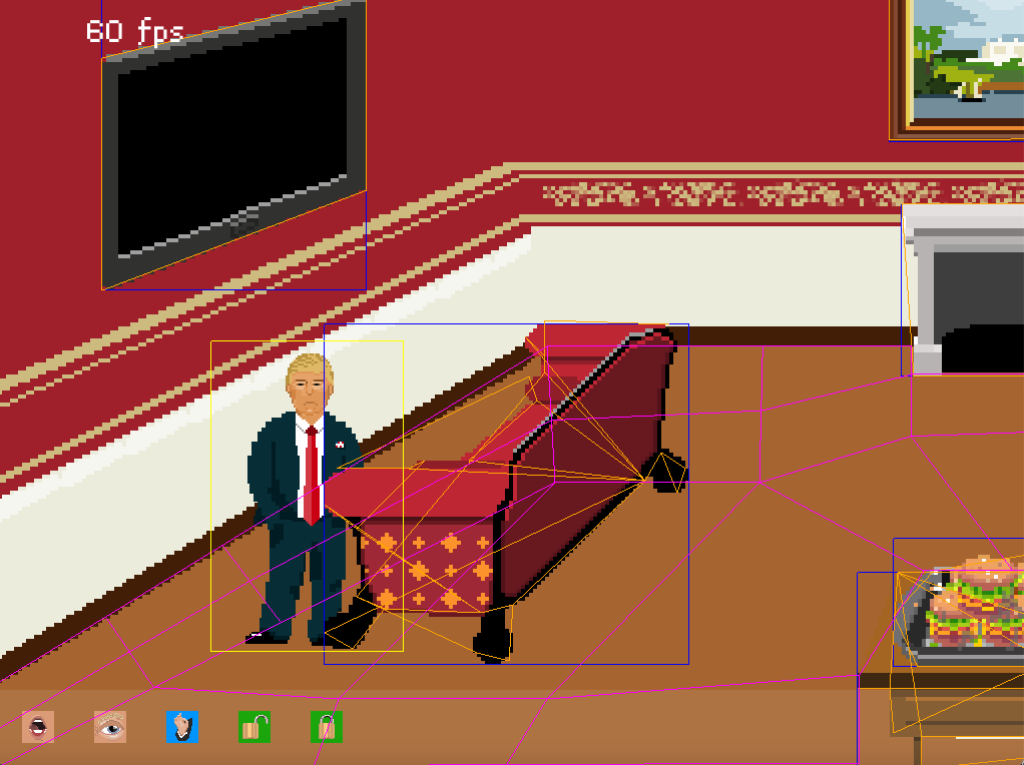
Finally a video where Zsorting and the surrounding ‘hidden’ world that makes it happen.. is shown:
Lately I revisited my LibGdx Point and Click engine. I was stuck for a long time because I was not happy of my pathfinding algorithm.
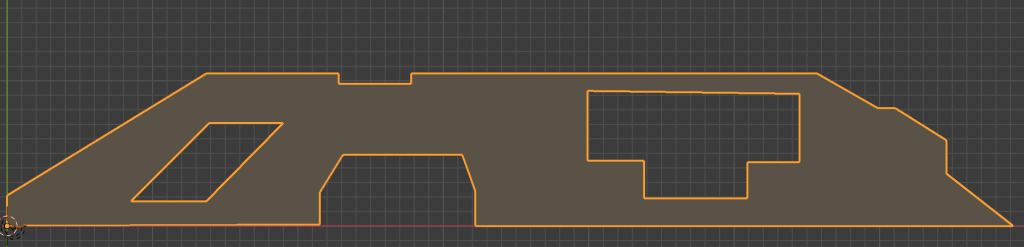
Navmesh Polygon Lines
But after a long investigation I finally found the way to do it. With the help of a Navmesh that a lot of point and click games use. This is actually a flattened area polygon that you are able to edit in an 3D editor like Blender. It is also often referred as a Walkbox.
Top view of the polygon Navmesh in Blender that represents the roomThe no move areas are the big sofa,dinnerplate with hamburgers, fireplace, and the dinnertable
But….. I had a lot of things to find out :
How to edit the Navmesh?
How to subdivide the Navmesh into quads?
How to cut some parts out of the Navmesh where the player cannot walk to?
Well there is actually a tool that helped me very much. It’s a tool that was released a while ago that allowed people to make Point and Click games for the Thimbleweed Park engine. See the great tutorial here. It is called Wimpy and it’s hard to find because you will get a lot of hits on ‘Diary of a Wimpy Kid’
What I am getting out of this tool is a list of polygon points that represents the walkbox. If the points are inside another walkbox, than it is assumed to be holes and those are the areas the player cannot walkto (Negative walkboxes).
Those points are then fed into a Javatool called Earcut4J. This tool is very good at creating a set of faces and vertices that make up a polygon. These list of faces and vertices are written into a Wavefront obj file that can be conveniently viewed by Blender as seen in above picture.
The code for an algorithm to do pathfinding on the Navmesh , I found here. It was a great inspiration of how to it as it also had a viewer so I could easily test out the obj file I generated with Earcut4j.
That was a lot…. Next time I will talk about ZIndex, ZSort, Zordering or whatever it is called. And all the challenges involved as I still have to fix this….
After experiencing some security issues with an outdated Joomla!.Because upgrading to a new Joomla site was too much of a hassle I decided to go for a managed WordPress site on my www.franzzle.com